While working on the new interface, we also spent time adding a whole bunch of new functionality to our knowledge base to get it ready for enterprise partners. Bank of America will be deploying this as their knowledge solution in the next few months.
The knowledge redesign started with two core principles:
- Transform articles from basic static content into a holistic solutions to problems
- Make it easy for everyone in the platform to access the knowledge
We have seen knowledge become a core component of our software and a key part of almost every new software partner that we have signed. We are promising our partners the ability to deliver the right knowledge to the right person at the right time and the new knowledge management system is the foundation for that promise.
There are now three main screens in the Knowledge section.
- Home screen - where you filter, browser and search for articles
- View screen - where you view articles (even if you can’t edit them)
- Edit screen - where knowledge managers can create and update articles
Home Screen
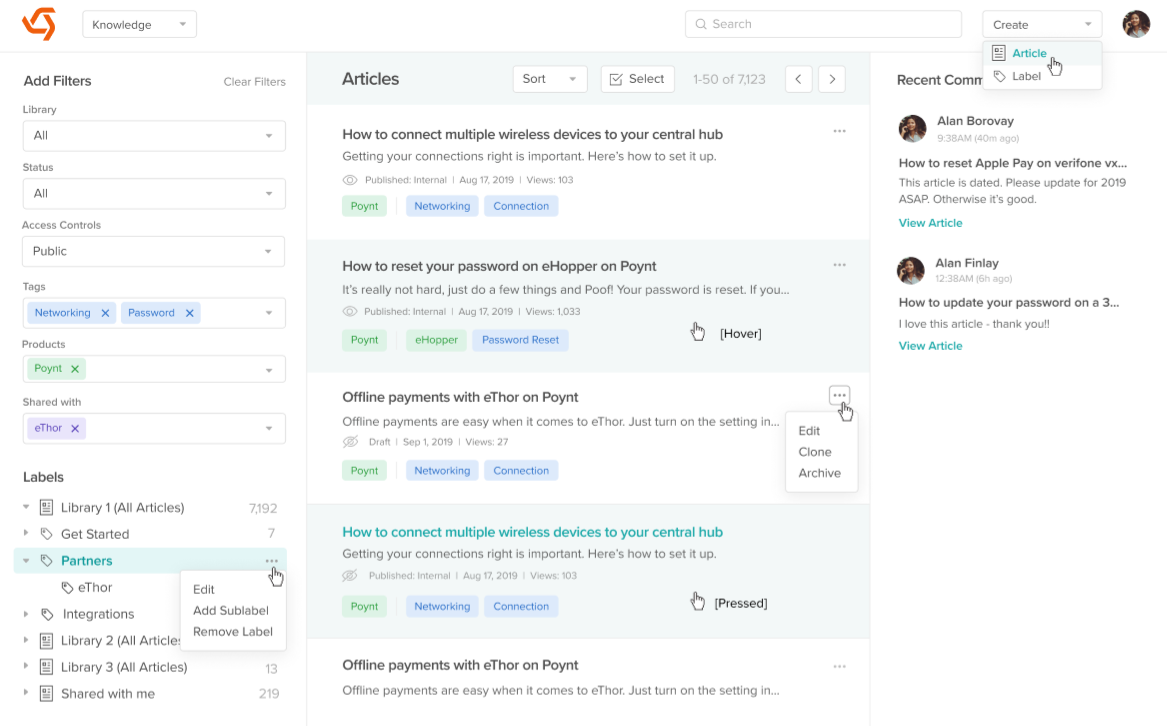
The goal of redesigning the home screen was to make it easier for anyone to find what they are looking for, even if they don’t know how the knowledge base is structured. In addition to search, we added a new set of filters that will help you quickly narrow down the list of articles so they’re easier to locate without having to always browse from the top level.
As you add filters on the left, the list of Articles will update in the center of the screen.
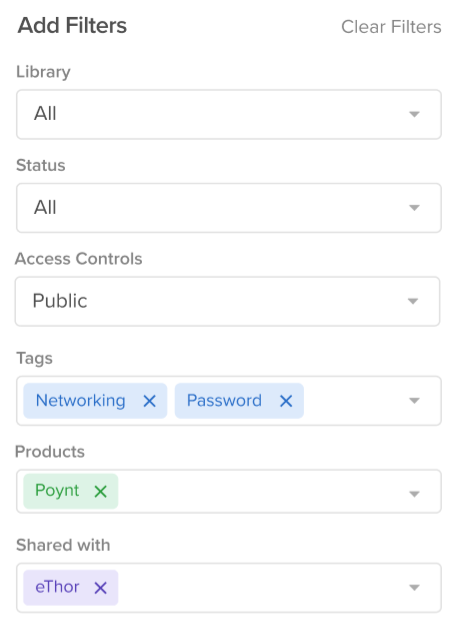
Filters
The filter options we added are:
- Library - This is the new name for a Knowledge Base. An organization can have multiple Libraries and each Library can have it’s own public website. From this filter you can view articles across all Libraries or you can filter to a specific library.
- Status - Filter between Draft, Published, and Archived.
- Visibility - Filter for Access Controls between Internal, Partner Ecosystem, and, Public articles.
- Tags - When you add a tag to this filter, it shows only Articles that have this tag on it. These are the same Tags used on Cases.
- Products - Filter your Article list by the specific Product it is related to. You can select from any Product in your organization’s product list.
- Shared With - This is a list of all organizations in your ecosystem and it filters articles to show only articles shared with specific organizations.
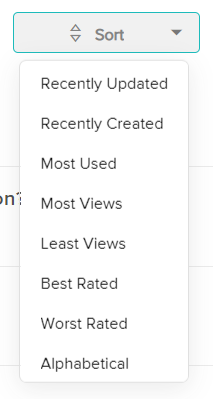
Sort
In addition to adding filters on the left side, you can now sort the list of Articles by a number of new options. Note that sort works in conjunction with filters (i.e. you can sort a filtered list). The possible ways to sort the articles are:
- Recently Updated (Default)
- Recently Created
- Most Used (added to a Case)
- Most Views
- Least Views
- Best Rated (thumbs up)
- Worst Rated (thumbs down)
- Alphabetical (By Article Name)
Sort and filters can work together to quickly answer questions. For example, “what is our most accessed Article about the VX520?” Filter Products = VX520, Sort by Most Views.
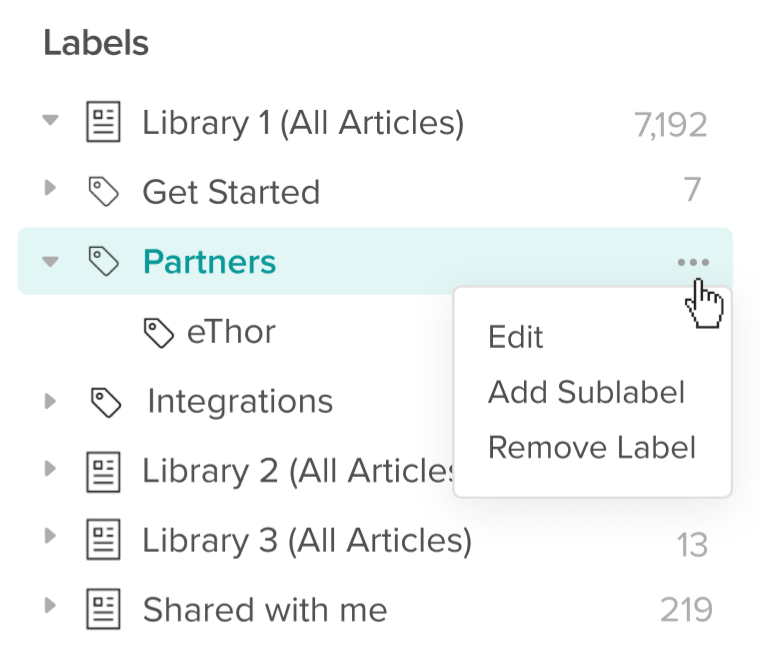
Labels
The final way to find the articles you are looking for is to use Labels. In this knowledge update we converted our folder structure to what we call Labels.
Visually labels feel a lot like a folder structure, but they provide much more flexibility for organization as well as additional use cases.
We retained the familiar folder hierarchy, but now an Article doesn’t have to live in just one folder. You can apply multiple Labels to an Article and that Article can then be found by accessing any of those Labels.
In addition, you can use Labels to organize your content outside of just your hierarchy. For example, you could have a label called “Needs Review” and you could tag that on any Article that you want to update so they get grouped in a single place for easy access. You can also make sure those labels never show up on the public knowledge base with some additional updates we made, which I’ll cover later.
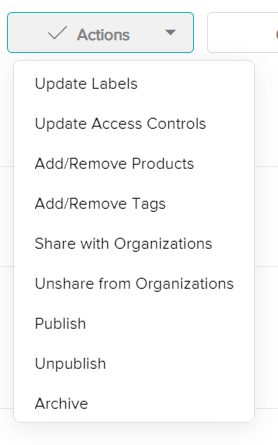
Bulk Actions
Managing knowledge at scale is hard. To make it just a bit easier, we introduced new bulk actions for Articles. Now you don’t need to click into every Article to make changes, rather you can do it all at once with a new and improved multi-select functionality.
The new bulk actions are:
- Update Labels
- Update Access Controls
- Add/Remove Products
- Add/Remove Tags
- Share with Organizations
- Unshare with Organizations
- Update Status
- Publish
- Unpublish
- Archive
So, for example, if you wanted to share all VX520 content with a new partner. You could add VX520 to the Products filter on the left, Click ‘Select’, check all the articles, and click ‘Share with Organization’ and add the partner name. Then you can unshare it just as easily by using the “Shared with” filter and adding the partners name, selecting all Articles, and clicking ‘Unshare with Organizations’.
This will also be helpful for product organizations when they are launching a new product. They can write all their content in advance of the launch and then on release date, select all the new content (Status = Draft on left filters), and use Bulk Actions to Publish all the Articles at the same time.
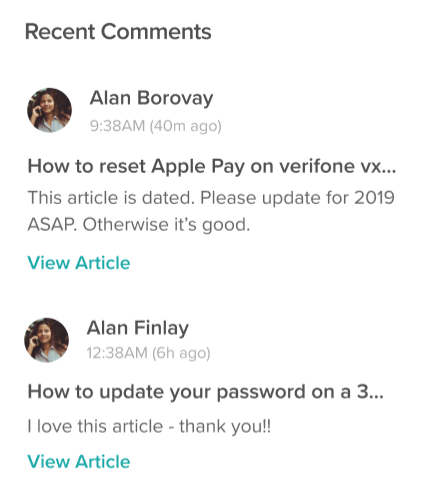
Comments
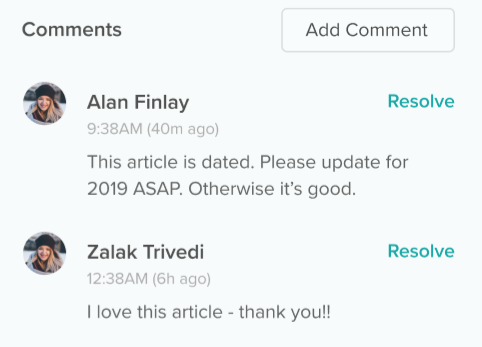
On the right side of the home screen you’ll find a new Comments section. This is a rollup of all comments left across all Articles. It shows the comment, who left it, and has a link to the Article. The goal of this comment section is to complete the feedback loop from the teams using the content to the teams adding and editing the content. Once a comment has been addressed, it can be resolved and hidden from view by users with the Edit Knowledge permission.
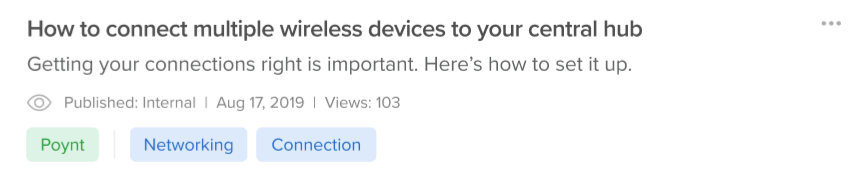
Article Cards
We updated the Article cards with new information and a new layout. We added some stats, the date the article was last updated, the related products, and the tags. We also made them single click.
View Screen
When you open an article you’re now brought to a new screen where you can view but not edit the content. The purpose of adding this new screen was to make the knowledge section more accessible to everyone that uses Boomtown and not just the teams that edit the knowledge.
In this view screen you can read the article, see when it was updated, view the stats, access the public URL, see all the tags, products, labels, and all other related content.
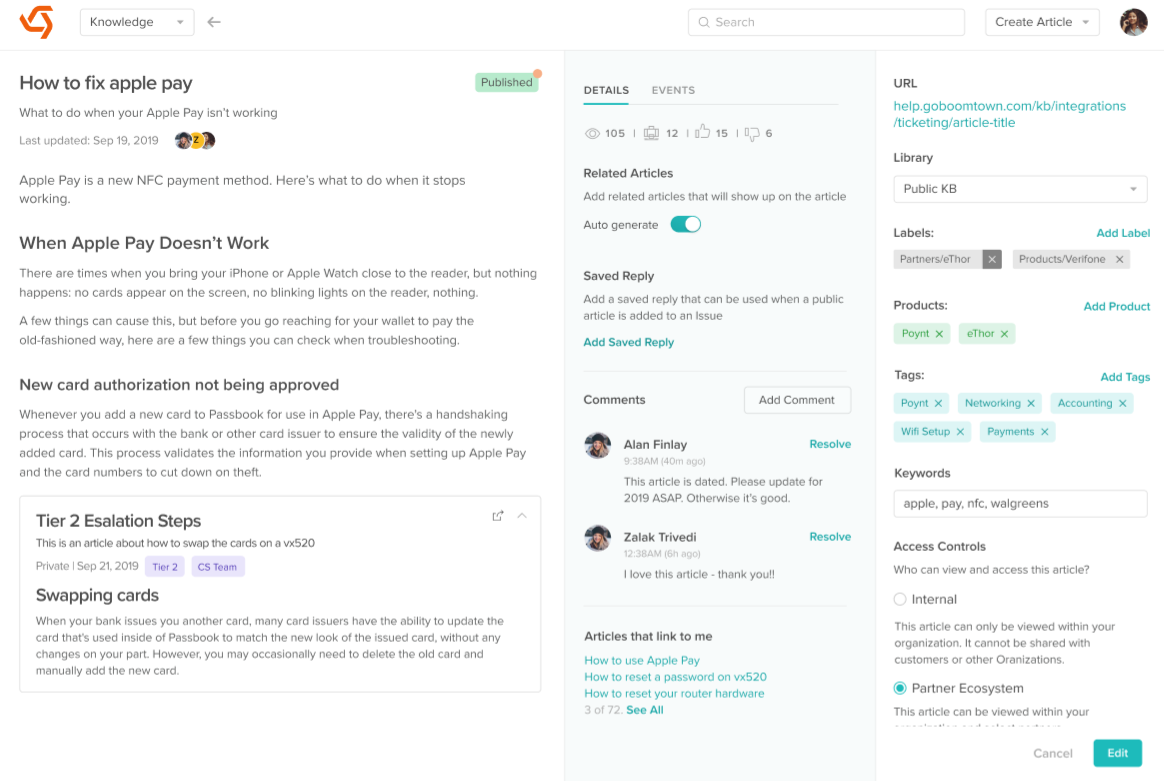
Edit Screen
Finally, where the magic happens. If you have edit permissions, you will see an Edit button on the View Screen.
In addition to making some usability improvements like updating the URL (and auto adding it based on the title), cleaning up the log, and updating the layout, there are a few new enhancements we added.
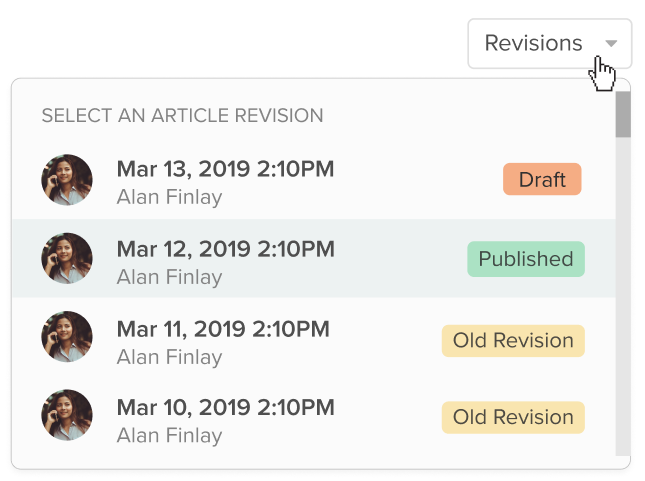
Revisions
The biggest change to the new knowledge base outside of the new layout is the addition of Revision History. With the old interface every time an article was saved, it was immediately published for all to see. This made it impossible to make edits to an active Article over multiple days before publishing those changes.
Each article now automatically captures all historical versions of the Article that are saved and published.
Each Article starts as a Draft. A Draft is not visible to anyone without the Edit Knowledge permission. Once you are done with your Draft, you can publish it and your Draft changes to a Published state. Now everyone that has access to it can see it. If you open the Published article, make changes and click save,, it will save a new Draft of that Article. That Article still has the Published version and now a new Draft version. When you publish the new Draft, it archives the previous Published version as a Revision and the Draft becomes the New Published version.
You can also revert old Revisions to the latest Draft if you want to return to an old version.
I know that’s a bit confusing, but the takeaway is that you now control when you publish an Article and you can save it any time you want.
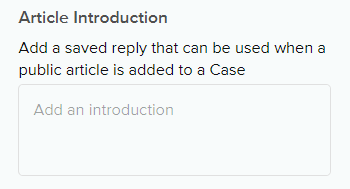
This is a new field where you can enter a pre-written response that gets populated in the chat or email composer on a Case whenever an Article is used on that Case. The goal is is to reduce the amount of time individuals have to spent typing out the same preambles for articles when they share them with customers.
Stats
Everyone wants to know how popular something is before using it. To help with this we surfaced a handful of simple stats to give you a quick sense of this.
- Views - number of times this Article has been viewed (on cases, from public KB, or from inside Boomtown Knowledge)
- Used on Cases - the number of Cases that this Article is attached to
- Thumbs up - sum of all thumbs up ratings received
- Thumbs down - the sum of all thumbs down ratings received
- Comments - total comments on the article (captured in backend but not surfaced on UI yet)

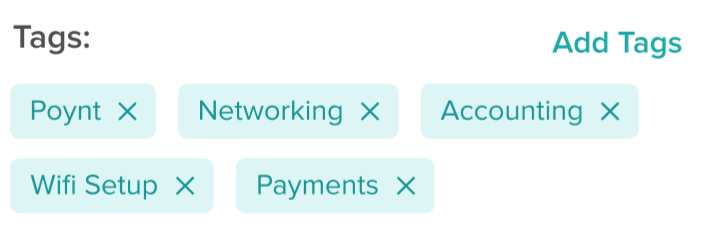
Tags
We added Tags to the Article, which are the same Tags that get added to Cases. This will help search and suggestions to deliver the best available Article to you when you are working on a Case.
Access Controls
We updated our Access Controls to be a bit more flexible. The updated Access Controls are:
- Internal - This article can only be viewed without your organization. It cannot be shared with customers or other organizations. You can give access to your entire organization or restrict access to specific Teams.
- Partner Ecosystem - This article can be viewed within your organization and can be privately shared with other organizations for internal use.
- Public - This article can be shared with customers and is available on your public knowledge base. It can also be shared with organizations for their internal use (access through Boomtown).
Resolve Comments
From this screen a user with the Edit Knowledge permission can resolve comments that were left on this article.
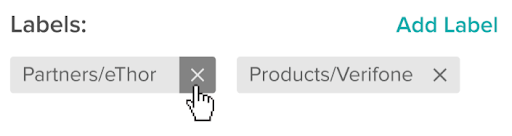
Labels
You can now add multiple labels to an article (vs an article being only in one folder). This means that you can have an article appear in multiple places in your knowledge base. You can also use labels as internal tags where you could create tags for “Hardware” “Troubleshooting” or “Needs update” as a way to organize your content internally.
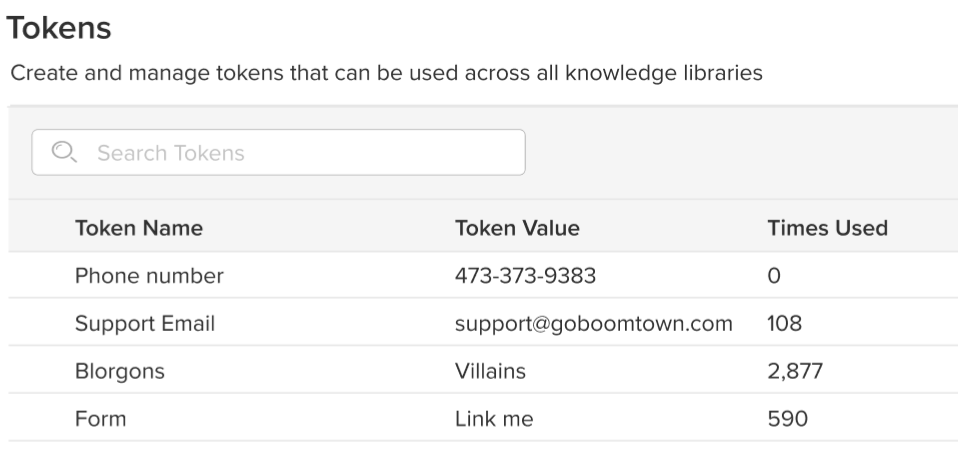
Tokens
We added a new feature for Tokens in the new UX. A token is a reference to another value that can be changed. So for example you can create a Token for {support_number} and then set {support_number} = 415-690-1610. You can then insert {support_number} into articles and it will display as 415-690-1610 when it’s viewed by other users. Then when your phone number changes, you can update the token value to the new phone number once and it will flow through all places where that token is used.
This is a helpful feature for large knowledge bases where teams repeat the same information on many pages and that information is likely to change.
Embedded Articles
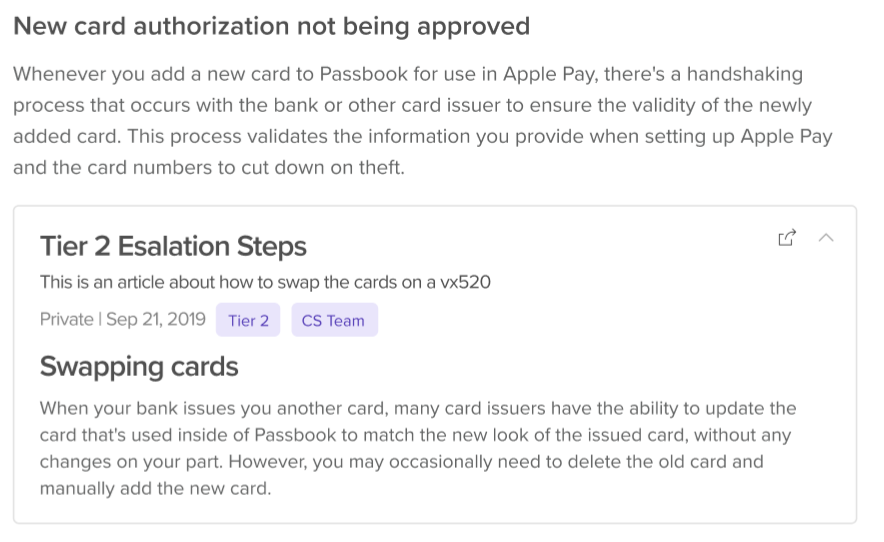
Embedded Articles is a very powerful new feature that allows teams to embed an Article inside another Article. Each Article retains its Access Controls, and you only see the embedded Article if you have the permissions to see it.
The power of embedded Articles is unlocked when you embed internal or partner ecosystem articles inside public Articles.
Here are a few examples of how we could use embedded Articles:
- Create an Article with escalation steps that only a Tier 2 team can access and embed it in the Public version of that article. Tier 1 teams won’t see the escalations steps but Tier 2 teams will without having to go to a different Article.
- Create an Article with generic steps for complex process (e.g. vx520 download), and then have embedded articles for the processor-specific steps. We could then share the processor specific steps only with the partners that have those processors.
- Sanitize Boomtown troubleshooting Articles and share them with partners and put all the Boomtown-specific content (escalation panthers, internal procedures, etc) into another Article that we embed in the primary Article.
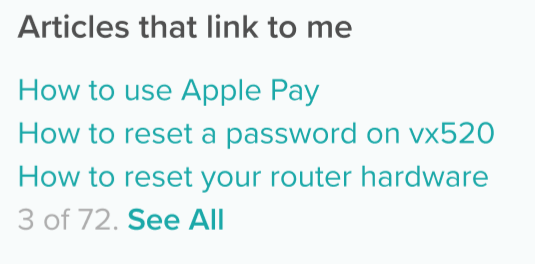
Articles that link to this Article
As we begin to roll out embedded Articles, it’s going to become very important to know where an Article is embedded so when you update the content, you know where it’s being referenced.
To solve this, we added a section that displays links to all the Articles that link back to this Article (whether embedded or linked).
Public Knowledge Library
Finally, we made a number of significant updates to how you can create, customize, and publish your public knowledge base.
First, we moved all Library customization to the Settings (Settings > Knowledge). Since this is generally something you update infrequently, we wanted to get it out of the way of the daily traffic.
When you open Knowledge, you can create a new Library or edit an existing one. As we mentioned, each Library can be its own site. Here’s what’s new on the Library configuration page.
Custom Home Page Labels
With the increased flexibility of Labels, we also added new functionality that allows team to decide which Labels (and underlying content) gets added to their public website, and which content does not. You can now specify a group of labels in your Library Settings and those Labels will appear on your public knowledge base. This gives you the flexibility to use Labels in more creative ways while not requiring you to put every label on your site.
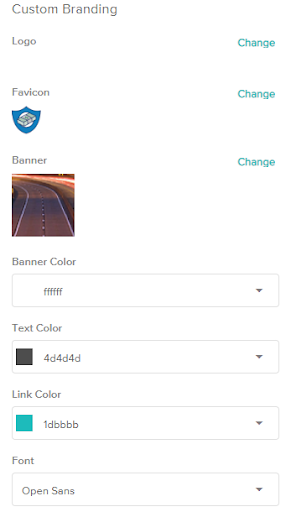
Branding
We moved all custom branding into the Library settings so you can control it all in one place. This includes:
- Logo
- Favicon
- Banner
- Font (typography and color)
- Link Colors
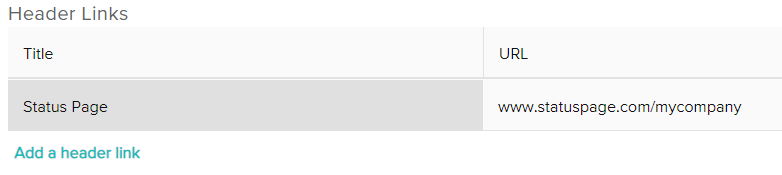
Header
You can now add custom hyperlinks to the header of your knowledge base through a simple interface.
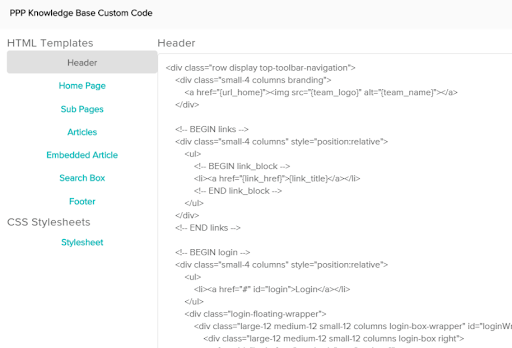
Custom Code
Finally, if you want to take your custom branding to the next level or you want to create custom components in your knowledge base (for example, a table of contents that appears on every Article), you can now directly edit the HTML and CSS code for all pages. The editable pages are:
- Home Page
- Sub Label Page
- Article Page
- Embedded Articles
- Search Box
- Header
- Footer
- Global CSS Stylesheet
SEO Optimized
Finally, we optimized all of our knowledge bases and Articles to be SEO friendly and automatically get picked up in search results. This includes:
- Automatically adding required metadata to every page (title, description, H tags, etc.)
- Capturing Alt Text on all images
- All public articles are index and made accessible to search crawlers
- Each Library automatically generates and updates site map